Short Link: http://wp.me/p5Jvc-aB
My previous three blogs have focused on the following areas in the Android platform:
This blog post is going to focus on Andriod application integration with the outside world using RESTful web services. Also it is going to look at how the wonderful Google Maps product can be integrated within Android App. My technology configuration as stated in the first blog post remains unchanged.
//Update Start 1st Oct ’12
Here’s the android manifest file for this blog post.
<?xml version="1.0" encoding="utf-8"?>
<manifest xmlns:android="http://schemas.android.com/apk/res/android"
    package="com.android.rest"
    android:versionCode="1"
    android:versionName="1.0" >

    <uses-sdk android:minSdkVersion="14" />
    <uses-permission android:name="android.permission.INTERNET"/>

    <application
        android:icon="@drawable/ic_launcher"
        android:label="@string/app_name" >
        <uses-library android:name="com.google.android.maps" />
        <activity
            android:label="@string/app_name"
            android:name=".RESTfulWebServicesActivity" >
            <intent-filter >
                <action android:name="android.intent.action.MAIN" />

                <category android:name="android.intent.category.LAUNCHER" />
            </intent-filter>
        </activity>
        <activity
            android:label="@string/app_name"
            android:name=".PostalCodeSearchActivity" >
            <intent-filter >
                <action android:name="android.intent.action.MAIN" />

                <category android:name="android.intent.category.LAUNCHER" />
            </intent-filter>
        </activity>
    </application>

</manifest>
//Update End 1st Oct ’12
Today’s tutorial is going to do two things. One, it is going to communicate with a public RESTful web service API, supply a postal code and getting details of possible matches for the code. The possible matches will be listed for the user’s convenience. On selecting one of the matches, the Google Map within the page will zoom in on the location.
To implement this I need to create two activities. The first activity PostalCodeSearchActivity will prompt the end user to supply the postal code/zip code to search. On receiving the postal code, the PostalCodeSearchActivity activates the second Activity RESTfulWebServicesActivity. As a part of RESTfulWebServicesActivity’s creation process, it starts an asynchronous task which interrogates the public RESTful Web Service API and retrieves possible matches. These are displayed in the RESTfulWebServicesActivity. On selection of a location, the location is displayed in the Google Maps view of the application. Enough of theory, let’s first look at the PostalCodeSearchActivity code.
package com.android.rest;

import android.app.Activity;
import android.content.Intent;
import android.graphics.Typeface;
import android.os.Bundle;
import android.text.InputType;
import android.view.Gravity;
import android.view.View;
import android.view.View.OnClickListener;
import android.widget.Button;
import android.widget.EditText;
import android.widget.LinearLayout;
import android.widget.TextView;
import android.widget.LinearLayout.LayoutParams;

public class PostalCodeSearchActivity extends Activity {

	@Override
    public void onCreate(Bundle savedInstanceState) {
        super.onCreate(savedInstanceState);

        LinearLayout layout = new LinearLayout(this);
        layout.setOrientation(LinearLayout.VERTICAL);

        LinearLayout.LayoutParams params = new LinearLayout.LayoutParams(LayoutParams.FILL_PARENT,
        		LayoutParams.FILL_PARENT);
        layout.setLayoutParams(params);

		TextView label = new TextView(this);
		label.setText("Enter the zip code");
		label.setMaxHeight(100);
		label.setTypeface(Typeface.DEFAULT, Typeface.BOLD);
		label.setGravity(Gravity.CENTER);
		label.setTextColor(this.getResources().getColor(R.color.white));

		final EditText searchField = new EditText(this);
		searchField.setInputType(InputType.TYPE_NUMBER_VARIATION_NORMAL);
		searchField.setMaxHeight(100);
		searchField.setTypeface(Typeface.DEFAULT, Typeface.BOLD);
		searchField.setGravity(Gravity.LEFT);
		searchField.setTextColor(this.getResources().getColor(R.color.white));
		searchField.requestFocus();

		Button searchButton = new Button(this);
		searchButton.setText("Search");
		searchButton.setOnClickListener(new OnClickListener() {

			@Override
			public void onClick(View v) {
				Intent i = new Intent(PostalCodeSearchActivity.this, RESTfulWebServicesActivity.class);
				i.putExtra(PostalCodeSearchActivity.this.getString(R.string.zip), searchField.getText().toString());
				startActivity(i);
			}
		});

		layout.addView(label);
		layout.addView(searchField);
		layout.addView(searchButton);

		this.setContentView(layout);
    }
}
In the PostalCodeSearchActivity’s onCreate method, a content View for postal code / zip code search is created. It consists of a EditText control to accept user input and a search button to trigger the postal code search. Refer lines 47 to 55 for implementation of the search button’s onClickListener. The onclickListener requires implementation of onClick method. As per our design, we need to pass on the user provided zip code information to RESTfulWebServicesActivity. In Android, this is implemented via the Intent class. We create an intent using two parameters, the first is the Context which is PostalCodeSearchActivity instance and second is the Activity class to instantiate RESTfulWebServicesActivity; refer line 51. Using putExtra method of the Intent we pass on the user inputted postal code information. The RESTfulWebServicesActivity activity is initiated by invoking the startActivity method with the Intent instance as its argument. Note the layout information dynamically defined in the PostalCodeSearchActivity class could have been easily defined in a xml. I did it out of habit but the best practice is to use a xml to define the PostalCodeSearchActivity layout.
Now let’s look at RESTfulWebServicesActivity’s source code. Here I have adhered to the best practice with the page content layout been defined in xml. Refer the main.xml located within res/layout folder of the Andriod project.
<?xml version="1.0" encoding="utf-8"?>
<LinearLayout xmlns:android="http://schemas.android.com/apk/res/android"
    android:id="@+id/main"
    android:layout_width="fill_parent"
    android:layout_height="fill_parent"
    android:orientation="vertical" >

    <com.google.android.maps.MapView
        android:id="@+id/map"
        android:layout_width="300dp"
        android:layout_height="250dp"
        android:layout_gravity="center"
        android:enabled="true"
        android:clickable="true"
        android:apiKey="AABBCCXX"
     />
    <ListView
        android:id="@+id/list"
        android:layout_width="wrap_content"
        android:layout_height="wrap_content"
     />

    <Button
    	android:id="@+id/backButton"
    	android:text="Go back to Search Page"
    	android:layout_gravity="center"
    	android:layout_width="wrap_content"
    	android:layout_height="wrap_content"
    />
</LinearLayout>
In the main.xml, we have defined the following elements an instance of MapView named map, a ListView named list and Button named backButton.
The MapView is a ready-to-use component for Google Maps. This component will display the location for given zip code/postal code. The MapView will only work once the developer obtains a free license. Google provides key string which is stored in the apiKey attribute of MapView. Details for obtaining the key are provided here. The ListView will display all possible matches for a given zip code and the back button will navigate back to the PostalCodeSearchActivity in case the user intends to revisit the zip code value. Next let’s look at the RESTfulWebServicesActivity source code.
package com.android.rest;

import com.android.async.GeoNamesAsyncTask;
import com.google.android.maps.MapActivity;
import com.google.android.maps.MapController;
import com.google.android.maps.MapView;

import android.content.Intent;
import android.os.Bundle;
import android.view.View;
import android.view.View.OnClickListener;
import android.widget.Button;

public class RESTfulWebServicesActivity extends MapActivity {

	/** Called when the activity is first created. */
    @Override
    public void onCreate(Bundle savedInstanceState) {
        super.onCreate(savedInstanceState);
        this.setContentView(R.layout.main);

        //Reset MapView
        MapView map = (MapView)this.findViewById(R.id.map);
        MapController control = map.getController();
        control.setZoom(2);

        //Add dynamic behaviour to Back button
        Button backButton = (Button)this.findViewById(R.id.backButton);
        backButton.setOnClickListener(new OnClickListener() {

			@Override
			public void onClick(View v) {
				finish();
			}
		});

        //Retrieve matching locations
        GeoNamesAsyncTask task = new GeoNamesAsyncTask(this);
        Intent i = this.getIntent();
        String zipCode = i.getStringExtra(this.getString(R.string.zip));

        if (zipCode == null) {
        	zipCode = "24501";
        }

        task.execute(zipCode);

    }

	@Override
	protected boolean isRouteDisplayed() {
		return false;
	}
}
Note that the Activity extends MapActivity. This is extremely important. This allows MapView to be used in the context of RESTfulWebServicesActivity class. In the onCreate method of the Activity, the content view is set to main.xml. The MapView is reset via lines 23 to 25. This is necessary or the MapView tends to retain the last selected result. Once a user has selected a zip code, the appropriate location is highlighted in the MapView; even if user navigates back to the PostalCodeSearchActivity and returns to the RESTfulWebServicesActivity, the previously selected location is displayed. Therefore we find the MapView component via the findViewById method, gain access to the view’s MapController and zoom out to move out of focus of the location. Next we implement a OnClickListener to the backButton. The onClick method implementation simply invokes finish method of the Activity. This causes the control to return back to PostalCodeSearchActivity.
As discussed earlier, the PostalCodeSearchActivity has supplied user input zip code to RESTfulWebServicesActivity. We create a asynchronous task named GeoNamesAsyncTask. Here’s the source code of GeoNamesAsyncTask.
package com.android.async;

import java.util.List;

import com.android.rest.R;
import com.android.rest.adapter.PostalCodeAdapter;
import com.android.rest.vo.GeoName;
import com.google.android.maps.MapActivity;

import android.content.Context;
import android.os.AsyncTask;
import android.view.View;
import android.view.ViewGroup;
import android.widget.LinearLayout;
import android.widget.ListView;
import android.widget.LinearLayout.LayoutParams;

public class GeoNamesAsyncTask extends AsyncTask<String, Void, List<GeoName>> {

	private Context ctx = null;

	public GeoNamesAsyncTask(Context ctx) {
		this.ctx = ctx;
	}

	@Override
	protected List<GeoName> doInBackground(String... arg0) {
		return new GeoNamesService().searchPostalCode(arg0[0]);
	}

	@Override
	protected void onPostExecute(List<GeoName> result) {
		this.populateActivity(result);
	}

	void populateActivity(List<GeoName> locations) {

		//Associate Adapter to ListView for matching locations
		MapActivity mapAct = (MapActivity)ctx;
		ListView list = (ListView) mapAct.findViewById(R.id.list);

		PostalCodeAdapter adapter = new PostalCodeAdapter(this.ctx, locations);
		list.setAdapter(adapter);

	}
}
The asynchronous behavior is induced in GeoNamesAsyncTask by making AsyncTask as its parent class. The AsyncTask accepts three parameters as its formal type parameters. The first parameter defines the type of argument it will accept in its execute and doInBackground methods. The third parameter defines the type for the onPostExecute method. The asynchronous task is triggered in RESTfulWebServicesActivity by invoking the execute method, refer line 46.
The GeoNamesAsyncTask constructor accepts a Context as argument. This is to retain reference to the triggering Activity. Within the task we need to implement two methods doInBackground and onPostExecute method.
The doInBackground method is activated on execution of the execute method. The GeoNamesAsyncTask in turn uses the services of GeoNamesService class to invoke relevant RESTful web service APIs and get matching location information. Details of GeoNamesService will be covered later.
Once the information is retrieved, the task’s onPostExecute method is invoked. Here we invoke custom populateActivity method which populates the ListView of RESTfulWebServicesActivity with matching location information.
Why does the RESTful Web Services processing needs to be asynchoronous? In case you try to do it in the context of the parent thread, the following exception is thrown:
12-21 17:38:38.058: E/AndroidRuntime(638): Caused by: android.os.NetworkOnMainThreadException
Now let’s look GeoNamesService source code.
package com.android.async;

import java.io.BufferedReader;
import java.io.IOException;
import java.io.InputStream;
import java.io.InputStreamReader;
import java.util.List;

import org.apache.http.HttpEntity;
import org.apache.http.HttpResponse;
import org.apache.http.client.ClientProtocolException;
import org.apache.http.client.HttpClient;
import org.apache.http.client.methods.HttpGet;
import org.apache.http.impl.client.DefaultHttpClient;

import com.android.rest.vo.GeoName;
import com.google.gson.Gson;

public class GeoNamesService {

	private static final String GEONAME_RESTURL
		= "http://api.geonames.org/postalCodeSearchJSON?maxRows=4&username=demo&postalcode=";

	GeoNamesService() {

	}

	public List<GeoName> searchPostalCode (String code) {

		String url = GEONAME_RESTURL + code ;
		HttpClient client = new DefaultHttpClient();
		HttpGet httpGet = new HttpGet(url);
		try {
			HttpResponse response = client.execute(httpGet);
			HttpEntity entity = response.getEntity();

			if(entity != null) {
				InputStream stream = entity.getContent();
				String responseString = convertStreamToString(stream);

				DataWrapper wrap = new DataWrapper();
				wrap = wrap.fromJson(responseString);
				return wrap.postalCodes;
			}

		} catch (ClientProtocolException e) {
			e.printStackTrace();
		} catch (IOException e) {
			e.printStackTrace();
		}

		return null;
	}

	private static String convertStreamToString(InputStream is) {
		BufferedReader reader = new BufferedReader(new InputStreamReader(is));
        StringBuilder sb = new StringBuilder();

        String line = null;
        try {
            while ((line = reader.readLine()) != null) {
                sb.append(line + "\n");
            }
        } catch (IOException e) {
            e.printStackTrace();
        } finally {
            try {
                is.close();
            } catch (IOException e) {
                e.printStackTrace();
            }
        }
        return sb.toString();
	}

	public class DataWrapper {
		public List<GeoName> postalCodes = null;

		public DataWrapper fromJson(String jsonString) {
			return new Gson().fromJson(jsonString, DataWrapper.class);
		}
	}
}
The RESTful Web Service API I am invoking belongs to geonames.org. The site provides free geographical database services. The registration is free and useful as the demo user has quota limits which routinely gets exceeded. I am using an API which provides me JSON payload. To convert JSON to Java Object I am using the Gson project. In case you need a framework for XML binding have a look at Simple.
The implementation of searchPostalCode method uses Apache Commons HTTPClient project to establish a HTTP connection with the Web Service. The Json response string is unmarshalled into Java object using Gson. Here’s the JSON string for postal code 80907:
{"postalCodes":[{"adminName2":"El Paso","adminCode2":"041","adminCode1":"CO","postalCode":"80907","countryCode":"US","lng":-104.817034,"placeName":"Colorado Springs","lat":38.876001,"adminName1":"Colorado"}]}
Here’s the structure of the GeoName class. The DataWrapper is part of GeoNamesService. The top level element in the JSON string is postalCodes which matches the attribute name in the DataWrapper class. The rest of the data maps to the List.
package com.android.rest.vo;

public class GeoName {

	public int postalCode = 0;
	public String placeName = null;
	public String countryCode = null;
	public float lat = 0.0f;
	public float lng = 0.0f;
}
The GeoName class defines only the relevant attributes from the JSON response. The attribute name within the JSON string and the GeoName class attributes are an exact match.
The final piece of the puzzle is the populateActivity method of GeoNamesAsyncTask. The method associates the List to the ListView using the PostalCodeAdapter. Here’s the source code of PostalCodeAdapter.
package com.android.rest.adapter;

import java.util.ArrayList;
import java.util.List;

import com.android.rest.OverlayItems;
import com.android.rest.R;
import com.android.rest.vo.GeoName;
import com.google.android.maps.GeoPoint;
import com.google.android.maps.MapActivity;
import com.google.android.maps.MapController;
import com.google.android.maps.MapView;
import com.google.android.maps.Overlay;
import com.google.android.maps.OverlayItem;

import android.app.AlertDialog;
import android.content.Context;
import android.content.DialogInterface;
import android.graphics.Typeface;
import android.view.Gravity;
import android.view.View;
import android.view.View.OnClickListener;
import android.view.ViewGroup;
import android.widget.AbsListView;
import android.widget.BaseAdapter;
import android.widget.LinearLayout;
import android.widget.LinearLayout.LayoutParams;
import android.widget.TextView;

public class PostalCodeAdapter extends BaseAdapter {

	private Context ctx = null;

	private List<GeoName> names = new ArrayList<GeoName>();

	public PostalCodeAdapter(Context ctx, List<GeoName> locations) {
		this.ctx = ctx;
		this.names = locations;
	}


	@Override
	public int getCount() {
		return names.size();
	}

	@Override
	public Object getItem(int arg0) {
		return null;
	}

	@Override
	public long getItemId(int arg0) {
		return 0;
	}

	@Override
	public View getView(int arg0, View arg1, ViewGroup arg2) {

		LinearLayout layout = new LinearLayout(ctx);
		AbsListView.LayoutParams params = new AbsListView.LayoutParams(LayoutParams.FILL_PARENT,
				LayoutParams.FILL_PARENT);
		layout.setLayoutParams(params);

		layout.setOrientation(LinearLayout.HORIZONTAL);

		GeoName location = this.names.get(arg0);

		TextView value = new TextView(this.ctx);
		value.setText(location.placeName);
		value.setMaxHeight(100);
		value.setTypeface(Typeface.DEFAULT, Typeface.NORMAL);
		value.setGravity(Gravity.CENTER);
		value.setTextColor(this.ctx.getResources().getColor(R.color.white));
		value.setOnClickListener(new CityClickListener(location));

		layout.addView(value);

		return layout;
	}

	class CityClickListener implements OnClickListener {

		private GeoName geoName = null;

		CityClickListener(GeoName name) {
			this.geoName = name;
		}

		@Override
		public void onClick(View v) {

			AlertDialog.Builder builder = new AlertDialog.Builder(ctx);
			builder.setView(createView());
			builder.setTitle("Details of " + geoName.placeName);
		    builder.setCancelable(true);

			builder.setPositiveButton("OK", new DialogInterface.OnClickListener() {
		           public void onClick(DialogInterface dialog, int id) {
		        	   dialog.cancel();
		           }
			});

			AlertDialog alert = builder.create();
			alert.show();

			updateMap();

		}

		private void updateMap() {

			MapActivity mapAct = (MapActivity)ctx;
			MapView map = (MapView)mapAct.findViewById(R.id.map);
			map.setScrollBarStyle(MapView.SCROLLBARS_INSIDE_INSET);
			map.setBuiltInZoomControls(Boolean.TRUE);
			map.displayZoomControls(Boolean.TRUE);

			GeoPoint point = new GeoPoint((int)(geoName.lat * 1E6), (int)(geoName.lng * 1E6));
			MapController mc = map.getController();
			mc.setZoom(17);
			mc.setCenter(point);
			mc.animateTo(point);

			List<Overlay> overlays = map.getOverlays();
			overlays.clear();

			OverlayItems items = new OverlayItems(ctx.getResources().getDrawable(R.drawable.marker));
			OverlayItem item = new OverlayItem(point, geoName.placeName, "" + geoName.postalCode);

			items.addOverlay(item);
			overlays.add(items);


		}


		private View createView() {

			LinearLayout l = new LinearLayout(ctx);
			l.setOrientation(LinearLayout.VERTICAL);
			LinearLayout.LayoutParams params = new LayoutParams(100, 300);
			l.setLayoutParams(params);

			TextView city = new TextView(ctx);
			city.setText("City, Country : " + geoName.placeName + ", " + geoName.countryCode);
			city.setMaxHeight(100);
			city.setTypeface(Typeface.DEFAULT, Typeface.NORMAL);
			city.setGravity(Gravity.CENTER);
			city.setTextColor(ctx.getResources().getColor(R.color.white));

			TextView orientation = new TextView(ctx);
			orientation.setText("Orientation : " + geoName.lat + " || " + geoName.lng);
			orientation.setMaxHeight(100);
			orientation.setTypeface(Typeface.DEFAULT, Typeface.NORMAL);
			orientation.setGravity(Gravity.CENTER);
			orientation.setTextColor(ctx.getResources().getColor(R.color.white));

			l.addView(city);
			l.addView(orientation);

			return l;
		}
	}
}
Refer the getView method on line number 61. Note the use of AbsListView.LayoutParams instead of LinearLayout.LayoutParams. If LinearLayout.LayoutParams is used the following exception is thrown:
java.lang.ClassCastException: android.widget.LinearLayout$LayoutParams cannot be cast to android.widget.AbsListView$LayoutParams
For clarification of why this occurs refer here.
The CityClickListener displays a dialog window with city, country and latitude and longitude details. The method createView creates the dialog window contents. The updateMap method updates the map with selected location’s lat/lng details. This is done by instantiating a GeoPoint. The GeoPoint accepts integer values for latitude and longitude in microdegrees; therefore the lat/lng values of GeoName has to multipled by 1E6 to get value in microdegrees. Next we set the zoom value of the MapView’s MapController and use the center and animateTo method to assign the GeoPoint.
To get the pointer effect of Google Maps, we add an OverLay to the Map, refer line number 125 to 132.
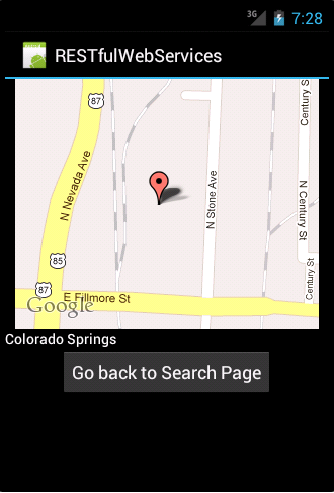
Here’s the output of our effort.

how to show multiple locations with multiple markers when user enters multiple latitude and longitude values
Hi Swetha,
Multiple locations with multiple markers can be displayed by adding multiple OverlayItem instances in OverLayItems refer lines 128-132 of PostalCodeAdapter’s source code. In my code sample I have added just one.
Thank you for your example.
Can you show example code how to add multiple marker at line number 128-132? Please
Hopolk,
Just create multiple OverlayItem instances and add them to OverlayItems instance. That should help you to get multiple markers in your map. For example source code look at this stackoverflow thread.
nice
i got error here “i.putExtra(PostalCodeSearchActivity.this.getString(R.string.zip), searchField.getText().toString());//i.putExtra(PostalCodeSearchActivity.this.getString(R.string.zip), searchField.getText().toString()); ”
why ?
Hi joe,
Can you send me the exact error message or exception that you encountered?
when i click i got “create field zip in type string”
😦
would it be possible to see/obtain the AndroidManifest.xml file?
Hi Manny,
The content of my manifest file has been added in the post. Refer section marked Update 1st Oct ’12.
hi,
thanks for the tutorial…can you please provide me the source code for this..
Hi Manju,
For each Java source, you can navigate to the right hand corner of the source layout. You will see four icons. The first two will allow you to view source or copy to clipboard.
I do not upload the entire project source into a single downloadable file. Sorry about that.
Hi ,
thanks for the tutorial.
I have got a problem here.i m unable to enter the zip code in edittext and the app stopped unexpectedly msg is displayed.
can u help me with that?
Hey Thanks! got it
I am working on android programing so can i get a solution for below issue:
How to add eMail feature to the code where the email is sent to the user soon after some click event occurs relatetd to the id choosen by user also defining some information as subject and a link to register back to the application via email.
Please provide the solution to my above mentioned problem ASAP really in need of it . Refer Bolg SS…..
Hi
am facing 1 more issue while deploying the webservices EAR file (com.sun.jersey.api.container.ContainerException: Exception obtaining parameters
at com.sun.jersey.server.impl.inject.InjectableValuesProvider.getInjectableValues(InjectableValuesProvider.java:54)
at com.sun.jersey.server.impl.model.method.dispatch.AbstractResourceMethodDispatchProvider$EntityParamInInvoker….)
in Weblogic but same is working with jBoss as tested on emulator.
Can i get a solution for this issue..??
this tutorial helped me lot for connecting rest webservices. Thanks a lot for providing this tutorial.
Excellent tutorial, really helpful in understanding REST Web services. Thanks a lot! 🙂
hey,
i want to store long/lat values of the markers on google map in a type of database in which the info in available to anyone who launches the app….. can u plz help me to make database with attributes (long,lat) …….so that whenever the app is launched, google map is populated with the markers already stored in the database .. thanks in advance!
Hey there! Thank you very much for your tutorials! Would it be possible to remove the max-width: 770px; from .two-column #container? It makes it very hard to read the source code snippets, IMHO.
Hi
in PostalCodeSearchActivity
@Override
public void onClick(View v)
{
Intent i = new Intent(PostalCodeSearchActivity.this, RESTfulWebServicesActivity.class);
i.putExtra(PostalCodeSearchActivity.this.getString(R.string.zip), searchField.getText().toString());
startActivity(i);
}
});
_____________________——
1_onclick(view v) eclips says Multiple markers at this line
– The method onClick(View) of type new View.OnClickListener(){} must override a superclass
method
– implements android.view.View.OnClickListener.onClick
2_R.string.zip it says Multiple markers at this line
– zip cannot be resolved or is not a field
– The method getString(int) in the type Context is not applicable for the arguments
(Class)
– Syntax error on token “.”, class expected after this token
why ?
thanks
Hi, i am getting error like “OverlayItems cannot be resolved to a type” how to break this error please help me……
can i use this tutorial to get my current location and keep update to web server and then back to me with location plotted on Google Maps?
Hi…I tried the code but I am not able to execute the code as there are errors like variables(zip, map, backButton etc..)could not be resolved. I kindly request to help me execute the code as its lil urgent.
Thank You.